
Three months into learning this, I stripped a screw on the bottom of a used Dell Latitude. Not the whole head. Just enough that Walt's old screwdriver spun in the slot and did nothing at all. I had the laptop upside down on a towel on the back room floor, and I sat there feeling exactly the thing I was afraid of when I started at 54: that I would turn out to be the person who breaks it.
That was March 2024. The reason I was learning anything at all is that my billing department at the hospital moved to new software in January and I felt lost in a way I could not explain to anybody. So I started at the kitchen table, evenings, and one of the first things I wanted was to see the inside of a computer with my own eyes. I bought the iFixit Pro Tech Toolkit that same week, after my nephew Theo told me a stripped screw is a tool problem and not a character problem. He was right. Thirty-two months later the kit lives in its magnetic case on the shelf above the desk, and I have not chewed up another screw.
The screwdriver that stops the damage before it starts
The iFixit Pro Tech Toolkit is the 64 bit driver set I bought in March 2024 and still open every time the Dell comes apart. Magnetic case, magnetic tips, and the anti-static wristband I put on before I touch anything inside.
Amazon Check Today's Price on Amazon →Before You Start: What Should Be on the Desk
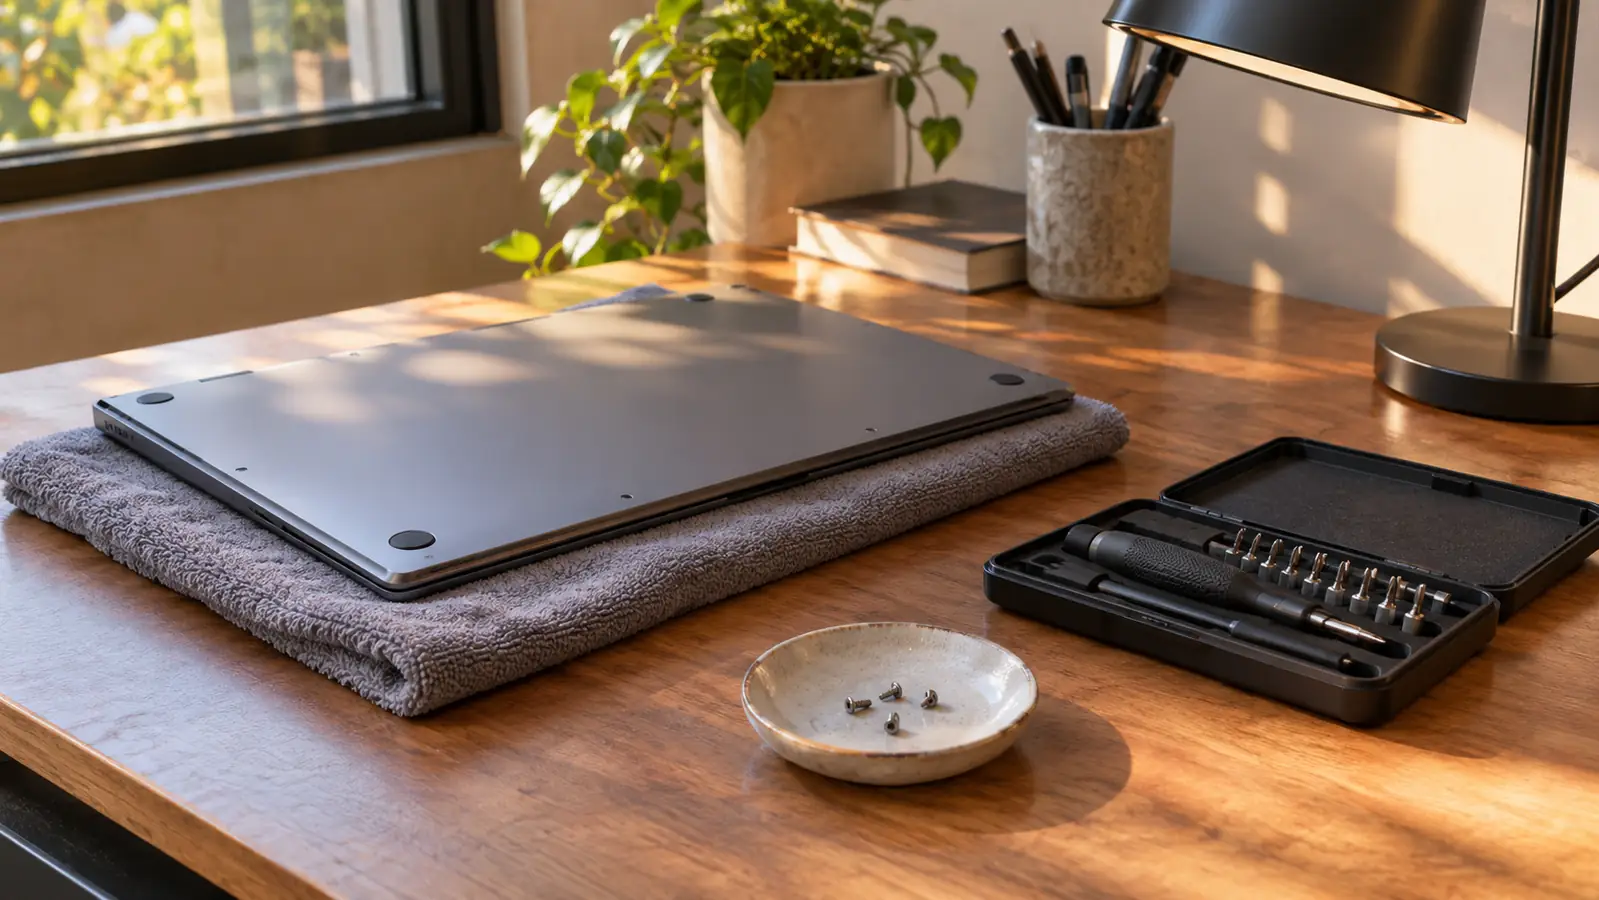
You need less than you think, and more light than you think. Here is what I actually set out now, after opening the same machine about a dozen times.
The kit itself. The iFixit Pro Tech Toolkit is a 64 bit driver set in a magnetic case with a foam insert, and it also holds tweezers, a flex extension, opening tools and an anti-static wristband. The bits are 4 mm across at the base and the driver tip is magnetic, which matters more than it sounds, because a screw sticks to the driver instead of dropping down into the case where you cannot reach it.
A towel or a folded cloth to lay the laptop on, face down, so the lid does not get scratched and the screws do not roll off the desk. A shallow dish. Your phone, for photographs. And the model number of the machine written on a piece of paper, because you will want it the moment you go looking for a guide.
What you do not need is every tool in the world. The listing says the kit covers Phillips, flathead, Torx, Torx Security, Pentalobe, JIS, hex, tri-point, nut driver and square heads. On one Dell I have used maybe five of those. The rest sit in the foam waiting, and that is fine.
Step 1: Shut It Down and Take the Power Out
Shut the machine all the way down. Not sleep. Not hibernate. Shut down, and wait for the little light to go out.
Then unplug the charger. If the battery slides out of the bottom with a latch, take it out. My Dell works that way and it is the simplest safety step in the whole job. If your battery is sealed inside, you are not removing it in this step and that is normal, but unplug everything and hold the power button down for about five seconds to drain what is left sitting in the board.
Why it matters: the inside of a laptop holds a charge for a little while after the machine is off, and a screwdriver is metal. At these voltages you are not going to hurt yourself. You can absolutely damage the board, and you will not know you did it until the machine will not start. Take the two minutes.
Step 2: Ground Yourself Before You Touch Anything Metal
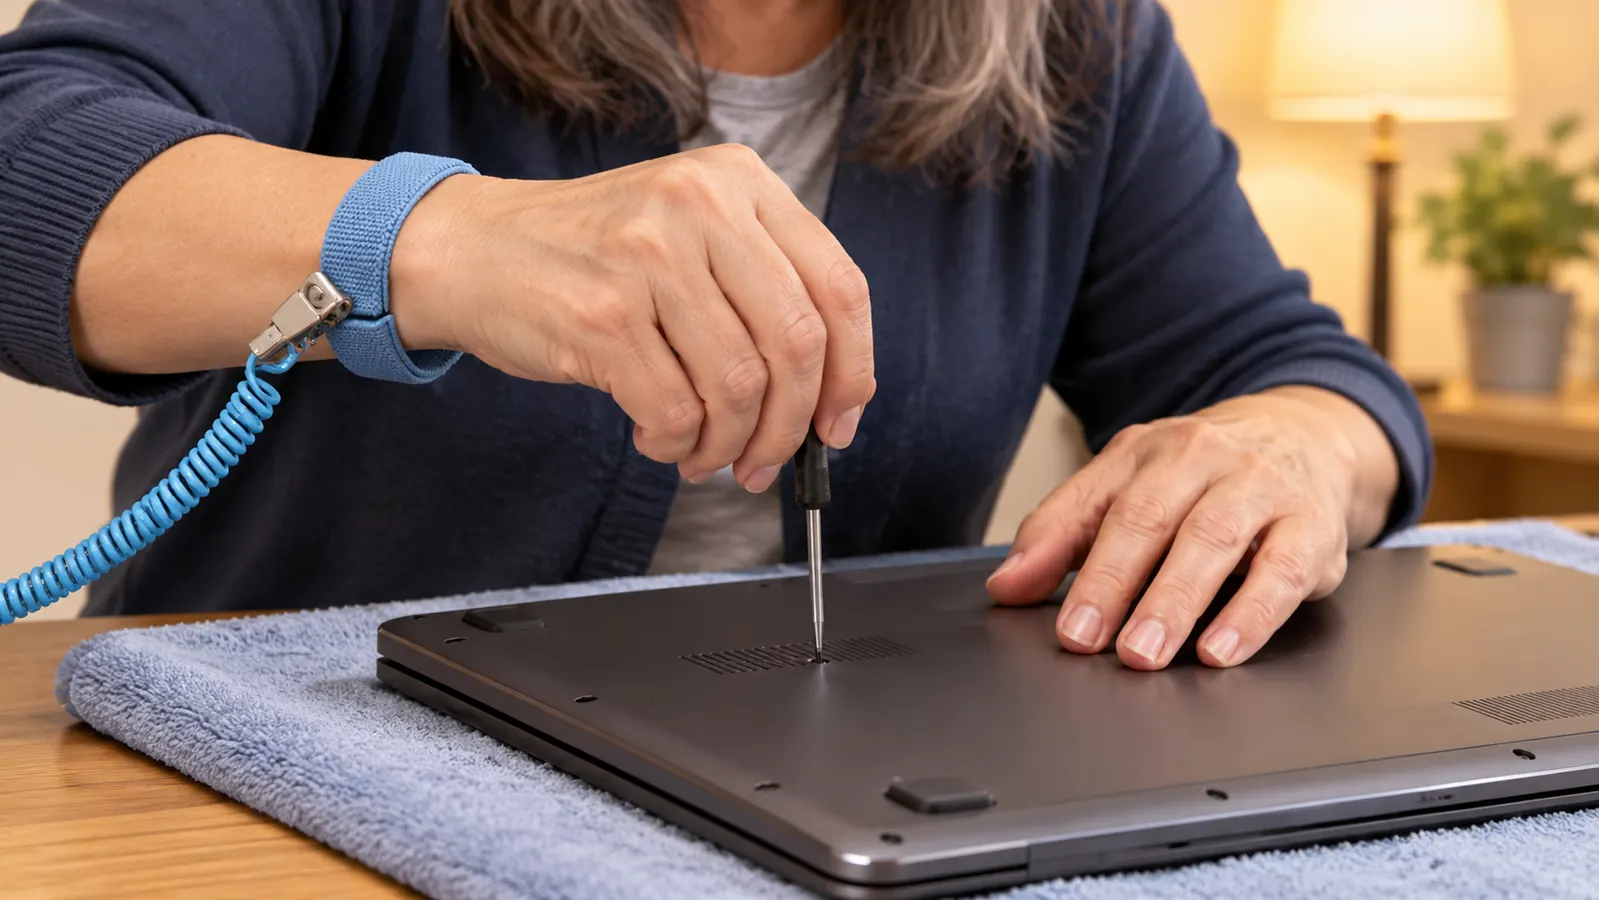
Static is the part that sounds like superstition and is not. Walking across a rug in a dry house can put a charge on you that you never feel, and if you touch a chip with it, the damage can show up a week later as a machine that will not start. Nothing about that feels fair, which is why people ignore it.
The kit includes an anti-static wristband. It goes around your wrist, and the clip on the end goes onto bare metal so that you and the machine sit at the same charge. I clip mine to the hinge on the Dell. In thirty-two months I have put it on for every job, including the ones where I was only opening the bottom to look.
If you ever lose the band, the old habit is to touch a bare metal part of the case before you touch anything inside. That is not as good. It is just better than nothing.
Step 3: Photograph It, Then Match the Bit to the Screw
Before a single screw comes out, photograph the bottom of the laptop. All of it. Then a second photo of anything that looks like a sticker or a rubber foot, because screws hide under those and you will not remember which one was where.
Then look hard at the screw head and pick the bit that fills it completely. Not close. Completely. This is the whole reason I stripped a screw in March 2024: I used Walt's one Phillips screwdriver on a head that was not a Phillips. The kit has 64 bits, all 4 mm at the base, so there is a bit for a Torx star, a Torx Security star with the pin in the middle, a JIS cross head that looks like a Phillips and is not, and a five point Pentalobe that I have never needed because I have never opened a phone.
If a bit rocks in the head, it is the wrong bit. Pick again. If you cannot tell what kind of screw you are looking at, seat the bit and turn a quarter turn with almost no downward pressure. The right bit stays put. The wrong one climbs out, and that is the beginning of a rounded head.
The listing says the kit is backed by thousands of free repair guides, and I have used those guides more than once to find out which screws come out first on a machine I had never opened. Look yours up before you start, not halfway through.
Step 4: Break the Screws Loose in Order and Keep Them in Order
Laptops are assembled in an order, and the screws are not all the same. Some are longer. Some have shoulders. Put a long screw back into a short hole and you can push it through the board on the other side.
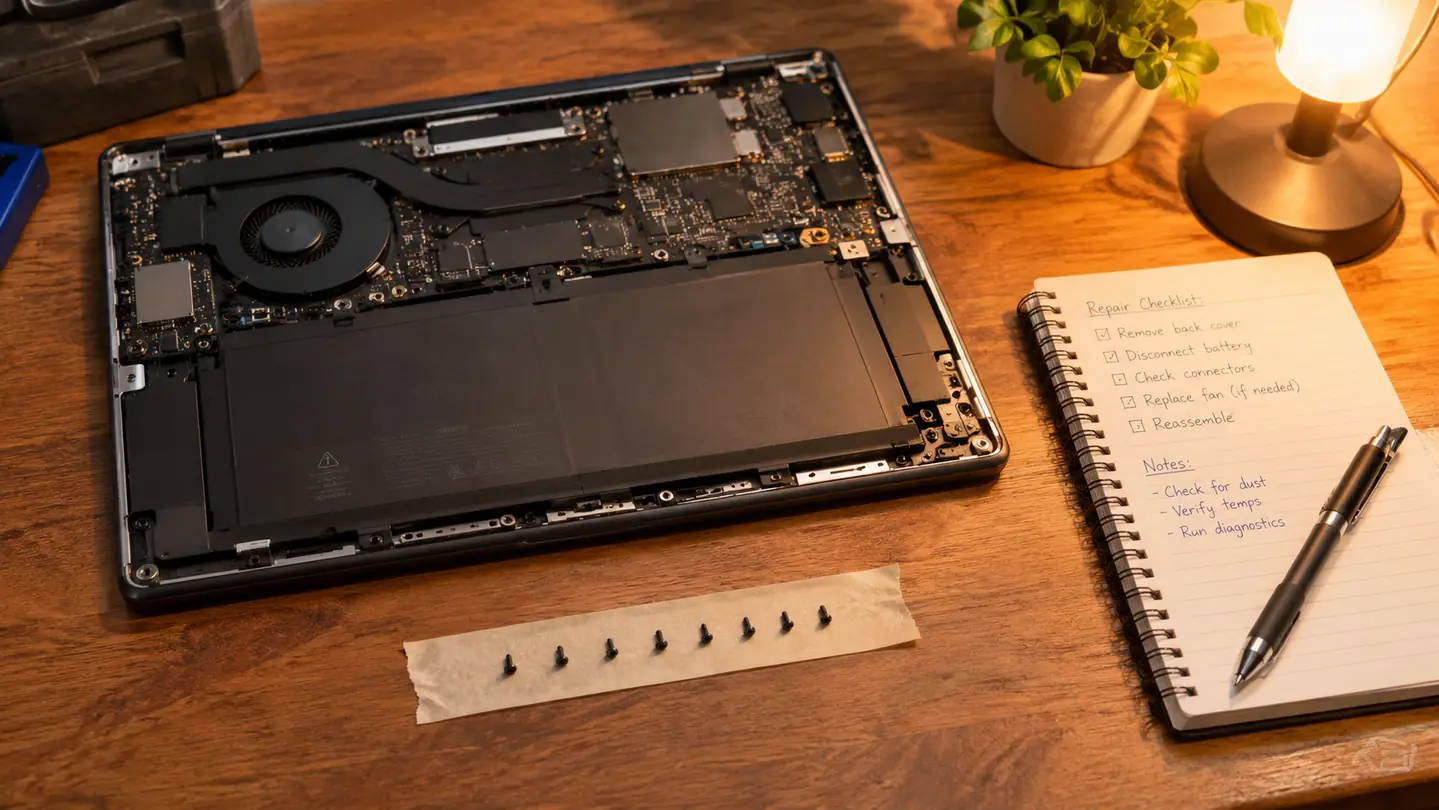
So keep the order twice, once with the camera and once physically. I lay a strip of tape on the desk sticky side up and set each screw on it in the pattern it came out of, top row to bottom row. The magnetic tip on the driver helps here too, because a screw sticks to the bit instead of dropping into the machine.
Break each screw loose with steady downward pressure and turn it out slowly. If one will not move, stop and look at it. Do not lean on it. A screw that turns hard is either cross threaded or has something else holding it, and force is how a head rounds off. On a used machine, a stubborn screw is often a sign that somebody was in there before you.
When the last screw is out, the panel usually still will not lift. That is the next step, not a reason to pull harder.
Step 5: Open Slowly, Then Free the Cables Before You Lift
Go around the seam with one of the opening tools from the kit. They are thin plastic wedges, and plastic does not gouge the case the way a butter knife does. Work slowly and listen for the clips letting go. There is usually a moment where the panel changes from stuck to free, and you will feel it before you see it.
Lift the panel a little and look underneath before you lift it all the way. Cables run along the edge on a lot of machines, and one of them is often a flat ribbon cable with a small latch. There are two common kinds of latch. One flips up, one slides back. Look at it for a second before you touch it. The tweezers in the kit are for exactly this, and for the tiny connectors, which are not designed to be pulled by the wire.
If a screw sits down in a deep hole where the driver handle will not fit, the flex extension is what you use. It is a flexible shaft that turns a bit in a space too tight for the handle. I have needed it twice, and both times I was glad it was in the case rather than in a drawer somewhere.
Then set the panel down somewhere it cannot be stepped on or sat on, and only then start on whatever you opened the machine for.
I have opened the Dell maybe a dozen times since March 2024. The only damage in this house is one screw head I chewed up with the wrong screwdriver before I owned a proper bit.
What Else Helps
Light. A desk lamp aimed at the machine, not the ceiling fixture behind you. Half the screws I have nearly lost, I nearly lost because I could not see the hole they came out of.
A slow evening. I do this on a Tuesday or Thursday between seven and nine, or on a Saturday morning, which is when I sit down to study anyway. Not at the end of a workday when I am already tired and want it finished. Nearly every mistake I have made in this house happened because I was rushing toward the part I actually wanted to do.
A practice machine. The used Dell Latitude was not the laptop I need for work, and that is the whole reason I could afford to be bad at this at first. If you only own one computer, either do the first open on a machine you can live without for a week, or wait until you have one.
Write things down. I keep a page in the back of my study guide with the order the Dell comes apart in. It took three jobs to get that page right, and now it saves me five minutes of squinting every time.
And do not go buying a second kit for a different job. The one case has done memory, a solid state drive and a clean out on the same machine. The listing says a lifetime guarantee. I have not needed it, and nothing in the case has broken in thirty-two months.
One last thing, said plainly. I am not going to tell you a toolkit gets anybody through a certification exam, because it does not. I failed Core 1 in February 2026 and passed it on my second try in May, and what changed between those two dates was hours at the kitchen table, not hardware. What the kit did was let me hold the parts that the study guide kept naming. That is a smaller thing, and it is real.
Start with the tool that does not round off the screw
The iFixit Pro Tech Toolkit. 64 bits, a magnetic case with a foam insert, tweezers, a flex extension, opening tools, and the anti-static wristband I put on before every job. The same kit that has opened the Dell since March 2024.
Amazon Check Today's Price on Amazon →